Want to bake artisan bread at home without guesswork? You can: mix flour, water, salt and a ripe starter, give the dough time, and bake it hot. This guide shows each step.
| Item | Value |
|---|---|
| Starter ready to bake | Doubles within 6 to 8 hours of feeding |
| Starter to keep back for next time | 113g |
| Feeding ratio | 1:1:1 by weight |
| Autolyse rest | 30 minutes to 1 hour |
| Bulk rise at room temperature | 3-12 hours, depending on conditions |
These figures come from King Arthur Baking’s sourdough guide and The Clever Carrot’s beginner’s guide. Times and quantities change with your kitchen and with the sources, so check them before you rely on the numbers.
What makes bread artisan?
Artisan bread describes a way of working more than a fixed standard. The loaf is mixed from a few ingredients, shaped by hand, fermented slowly and baked hot enough to build a deep crust. The sources behind this guide give no formal definition, so read the word as a description of method.
King Arthur Baking’s guide describes a loaf with a deep brown crust, rich flavor and mild tang that relies solely on its starter for its rise. In the guide’s words, “Without the addition of commercial yeast, it’s a true artisan loaf.” You can read the full description in the King Arthur sourdough baking guide.
The word sourdough deserves a small correction. Baking Sense explains that it really means bread or pastry made with wild yeast instead of commercial yeast, and that not every loaf made this way tastes strongly tangy. That means you can steer toward a milder loaf without giving up the wild-yeast method, as the Baking Sense sourdough guide points out.
Flavor and rise come from different organisms. A King Arthur blog post dated October 13, 2015 says a starter is made up of bacteria and wild yeast that dwell together, with flavor development coming primarily from bacterial activity while yeast contributes to rise. You can find that explanation in the artisan sourdough bread tips post.
The same post makes a practical point: rather than hunting for tricks to change flavor, keep a healthy, active starter that nurtures both bacteria and yeast. A strong starter is the single most useful habit you can build, and the rest of this guide leans on it.
A basic loaf needs very little equipment. Here is a short kit list:
- A ripe starter, plus flour, water and salt.
- A digital kitchen scale, so you weigh rather than scoop.
- A large bowl with room for the dough to rise.
- A hot, lidded pot such as a Dutch oven, if you have one.
- Time, because slow fermentation is what gives the loaf its character.
The sections below follow the loaf in the order you will bake it: starter, mixing, fermentation, shaping and baking. Skim to the part you need, or read straight through before your first bake.
Building and keeping a starter
A starter is the engine of the loaf, so it has to be ready on baking day. The Clever Carrot describes a sourdough starter as a live fermented culture of flour and water that naturally leavens bread dough without commercial yeast. That description appears in its sourdough bread beginner’s guide.
Our walkthrough on how to make sourdough starter covers the early days if you are beginning from scratch. A gifted or purchased starter works too, since the same beginner’s guide lists homemade, purchased and gifted as the usual routes.
A simple feeding routine
The Clever Carrot’s routine uses a 1:1:1 feeding ratio by weight, and suggests a warm spot, ideally 75°F, until the starter is bubbly, active and doubled, which can take 2-12 hours. The steps are below, and you can read the original in The Clever Carrot’s guide.
- Remove and discard half of your starter.
- Feed what is left in the jar with equal parts flour and water by weight.
- Let it rise, loosely covered, in a warm place until it is bubbly, active and doubled in size.
Weigh everything, even for feedings. Baking Sense warns that feeding or mixing by volume can slowly throw off your flour-to-water ratio and affect your results, which is why a scale earns its place on the counter. See the Baking Sense sourdough guide for the full reasoning.
How to tell a starter is ready
King Arthur Baking gives a clear picture of a ripe starter. It has doubled in size, bubbles are breaking on the surface, and it feels somewhat elastic to the touch. Use this checklist before every bake:
- The starter has clearly risen and looks bubbly and vigorous.
- Bubbles break on the surface instead of sitting still.
- The texture feels somewhat elastic when you touch it.
If you see faint creases on top, lots of foamy bubbles and a slightly concave surface, the same King Arthur guide says the starter is just barely past its prime. It adds that it is still fine to bake with, so a slightly late starter is no reason to cancel the bake.
If you are unsure, try the float test from The Clever Carrot. Drop 1 tsp of starter at peak height into a glass of water. If it floats to the top it is ready to use, and if it sinks you should feed it again, as the beginner’s guide explains.
Keeping it alive versus getting it ready
King Arthur separates a starter that is merely being kept alive from one being readied for baking. To create baking-ready starter, feed it until it doubles in size within 6 to 8 hours of being fed. Measure out what your recipe needs, retain 113g for the future, and feed that retained portion before refrigerating it, as described in the King Arthur sourdough guide.
How often you feed depends on how often you bake. The Clever Carrot says that if you only bake a few times a month, you can store the starter in the refrigerator and feed it once a week. You can find that advice in its starter storage notes.
What to do with discard
Discarding part of the starter before feeding is a normal part of keeping it healthy. According to Baking Sense, discard has limited ability to leaven bread on its own because it has not been fed, so it is not suitable for baking a naturally leavened loaf. For short-term storage, it says discard will usually keep for 1-3 weeks in a covered container in the refrigerator, per the Baking Sense guide.
Think of discard as a flavoring ingredient rather than a leavener. It works well where flavor matters more than lift:
- Quick breads
- Pancakes and waffles
- Crackers and flatbreads
- Cakes
Mixing, autolyse and hydration
Start the dough by weighing. The Clever Carrot advises weighing your ingredients with a digital kitchen scale, because measuring cups vary in size and do not account for ingredient density, which can lead to dry, dense or overly sticky dough. Its beginner’s guide makes this the first tip for good reason.
Do not worry if the dough looks rough at first. The same guide says the dough will feel rough and shaggy, which is normal. You are only bringing the flour and water together before the rest does the work.
The autolyse rest
If you have wondered what is autolyse, it is simply a rest after mixing. The Clever Carrot describes it as the first rest after mixing bread dough, one that jumpstarts gluten development without kneading and makes the dough stronger, stretchier and easier to shape. Its recipe lets the covered bowl rest for 30 minutes to 1 hour at room temperature, as shown in the Clever Carrot recipe.
Bakers disagree about salt timing. Baking Sense defines autolyse as a rest after flour and water are mixed, before adding salt. The Clever Carrot notes that some bakers add salt only after autolyse, believing it slows gluten development, but now mixes everything at once because it is simpler. Both approaches make good bread, so pick one and stay consistent while you learn.
Autolyse also helps if you want to add flavor. The Clever Carrot suggests mixing in additions after autolyse, when the dough is softer and more pliable. Ideas from its list include:
- Roasted garlic or chopped olives
- Fresh or dried herbs such as rosemary and thyme
- Seeds or nuts
- Cheese
Understanding hydration
Hydration is the ratio of water to flour in a dough. Baking Sense gives a simple example: a dough with 10 oz of flour and 8 oz of water has a hydration of 80%. The guide on bread hydration percentage goes further into how to work out and adjust that figure, and the Baking Sense guide has the definition.
Wetter dough is harder to handle. King Arthur’s high-hydration whole wheat sourdough describes itself as a bit of a project, with ultra-high hydration (the slack dough resists easy handling) and a long timeline of nearly two days start to finish. The listing shows 30 mins hands-on, 50 mins of baking and a yield of 2 loaves, and promises a robust, deeply flavored loaf with a moist crumb, according to the King Arthur recipe page.
For your first loaves, stay with a simpler dough. You can also develop gluten in different ways: Baking Sense notes that even wet doughs can be kneaded with a dough hook, while gluten can also be developed with stretch-and-folds. Choose whichever method fits your kitchen, and see the Baking Sense guide for more.
How long should bulk fermentation take?
It depends mostly on temperature, so watch the dough rather than the clock. The Clever Carrot says the dough is ready when it is puffy, slightly domed and nearly double in size, which can take 3-12 hours depending on room temperature, the quantity and strength of your starter, and seasonal conditions. Read more in the beginner’s guide.
Our deeper page on bulk fermentation time expands on how to read the dough. For now, remember that sourdough takes longer to rise than yeasted bread and depends heavily on your specific environment, a point the same Clever Carrot guide stresses.
Three things move the clock most:
- The temperature of your kitchen and of the dough.
- How much starter you use, and how strong it is.
- The season, which changes your kitchen’s temperature.
The Clever Carrot gives a real example for a recipe using about 150 g of starter. In summer it takes roughly 2-4 hours at 80°F (26°C), while in winter it takes roughly 10-12 hours at 68°F (20°C). Its summary is short and useful: temperature controls time, and the suggested rise is at about 68-70°F (20-21°C), per the Clever Carrot guide.
Slowing things down in the fridge
Baking Sense defines cold fermentation as slowing fermentation by chilling the dough in the refrigerator. It also notes that fermentation happens during bulk rise, cold retarding and final proofing. A cold rest is a handy way to fit a long ferment around your schedule, as the Baking Sense glossary shows.
Folding and shaping
Folds are how you build strength without heavy kneading. One pastry chef’s guide describes hourly folds as a way to monitor the dough and redistribute yeast while strengthening the structure. You can see that note in the Baking Sense process section.
When the dough is ready, you shape it. King Arthur’s sourdough hub lists how-to material on preshaping, bowl folds and shaping a bâtard, among other techniques, in its How to Bake Sourdough page. Gentle handling at this stage keeps the gas you built during the rise.
Scoring and baking in a Dutch oven
The last decisions happen just before the oven. King Arthur’s Sourdough Country Bread uses unfed starter, minimal kneading, long fermentation and baking in a hot Dutch oven, techniques that its page says make a bakery-quality loaf simple to make at home. That is a strong model for a first artisan bake, as the King Arthur sourdough page explains.
Our page on dutch oven bread baking looks at that method in more detail. A heavy lidded pot is a setup choice, not a requirement stated in these sources, so use what you own and adjust.
Scoring is the final shaping step. The page on how to score bread covers the cuts, and King Arthur lists a how-to on scoring bread dough in the same sourdough hub. Practice on a few loaves and you will soon settle on a pattern you like.
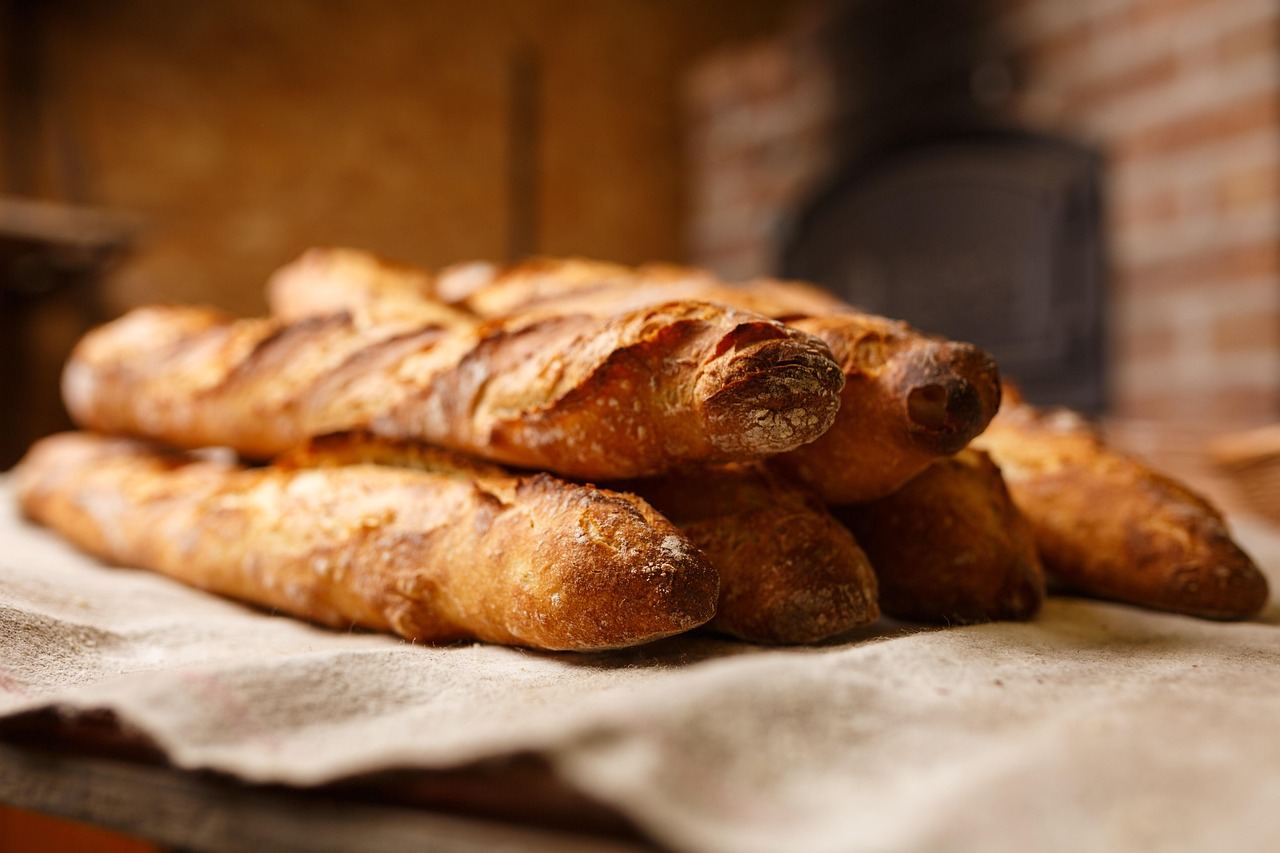
Plan the day backward from your bake. A reliable order looks like this:
- Feed your starter ahead of time so it is ripe when you need it.
- Mix the dough, then let it rest for autolyse.
- Bulk ferment, folding as the dough needs.
- Shape the loaf and let it finish rising, warm or chilled.
- Score and bake in a hot, lidded pot.
Baking time depends on the loaf. For scale, King Arthur’s high-hydration whole wheat recipe lists 50 mins of baking for 2 loaves, according to its recipe page. Always follow the recipe you are using rather than borrowing times from another.
Fixing dense loaves and what to bake next
Most dense loaves trace back to a few causes. If yours turns out heavy, the guide on why is my sourdough dense walks through them. Start with this checklist:
- The starter was not ripe, so it had little lift.
- The rise was cut short because the kitchen was cooler than you assumed.
- Ingredients were measured by volume, which Clever Carrot says can lead to dry, dense or overly sticky dough.
That last point comes from The Clever Carrot’s advice to use a digital scale, found in its beginner’s guide. The first two connect to the earlier sections on starter readiness and on how temperature controls time.
If you are new to all this, begin with a plain dough. Baking Sense suggests starting with a basic sourdough bread recipe of just starter, flour, water and salt, and our sourdough bread recipe for beginners follows that spirit. The Baking Sense guide explains why a basic loaf is the best way to learn how dough behaves.
If your new starter feels uncertain, King Arthur offers a hedge. Its Rustic Sourdough Bread uses a bit of packaged yeast for insurance, which suits a beginning baker unsure whether a newly created starter is strong enough, according to the King Arthur guide.
Artisan loaves also sit inside larger food traditions. Our overview of French baking gives wider context for hand-shaped, slowly fermented breads. If regional cooking interests you, read about Béarn cuisine for ideas on what to serve alongside a fresh loaf.
This is an independent editorial site. It is not affiliated with King Arthur Baking, The Clever Carrot, Baking Sense or any other source named here, which appear only as references for the facts above.
Frequently asked questions
Is artisan bread always sourdough?
Show answer
No. Artisan describes a hand-made, slow-fermented method, while sourdough means wild yeast instead of commercial yeast. King Arthur’s Rustic Sourdough Bread even uses a bit of packaged yeast for insurance, per its sourdough guide.
Can I use discard to make a naturally leavened loaf?
Show answer
Baking Sense says no: discard has not been fed, so it has limited ability to leaven bread and is not suitable for a naturally leavened loaf. It works well in pancakes, crackers and quick breads instead, according to the Baking Sense guide.
How do I know my starter is ready to use?
Show answer
Look for a starter that has doubled, shows bubbles breaking on the surface and feels somewhat elastic, as King Arthur describes in its sourdough guide. You can also run the float test from The Clever Carrot: if a spoonful floats in water, it is ready, and if it sinks, feed it again.
How long does an artisan loaf take from start to finish?
Show answer
It varies by recipe and kitchen. King Arthur’s high-hydration whole wheat sourdough lists a total time of 2 days with 30 mins hands-on, while simpler doughs move faster; see its recipe page. Check the source before you plan around any single time.