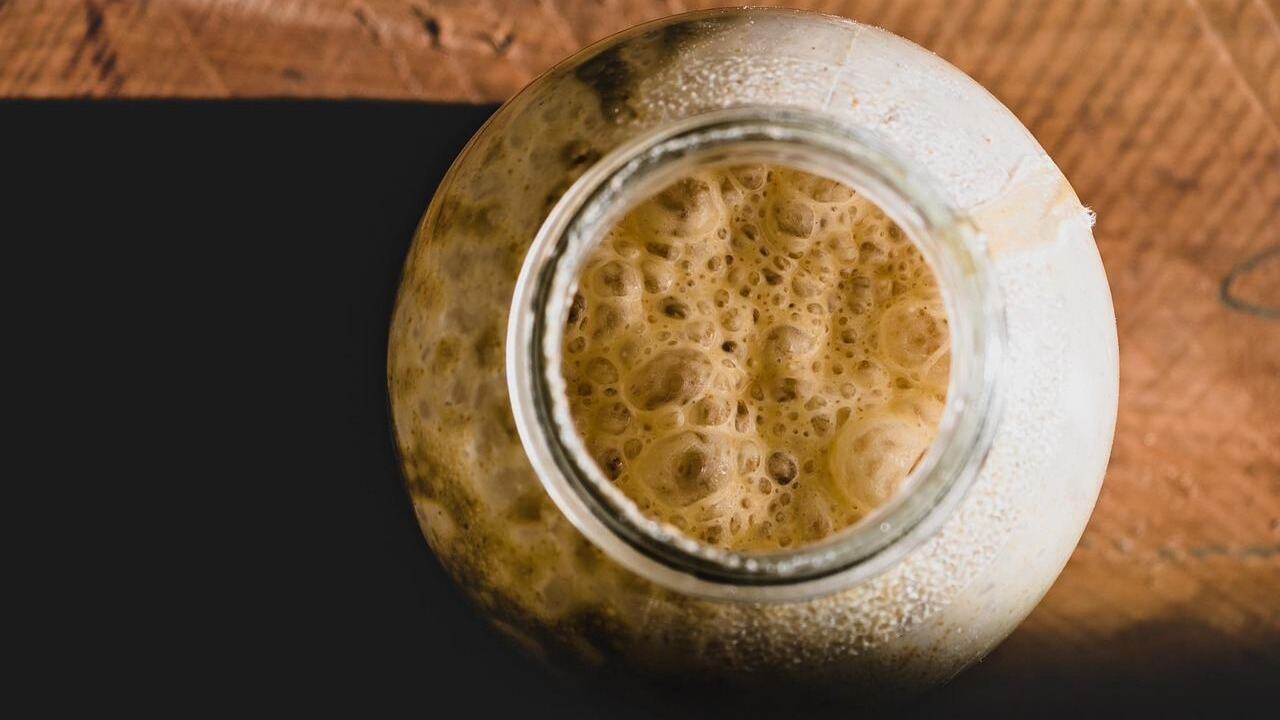
Worried that making a starter from nothing is a gamble? Learning how to make sourdough starter is mostly patience: mix whole grain flour with water, feed it on a steady schedule, and expect bubbles after about a week.
This guide is one part of the artisan bread section of the site, so you can move on to baking once your jar is lively.
| Detail | Value |
|---|---|
| Time to build a starter | About a week |
| Day 1 flour | 113 g whole wheat or pumpernickel |
| Room-temperature mixing water | 68°F to 70°F |
| Water temperature ceiling | Below 110°F (43°C) |
| Ideal kitchen temperature | 75-80°F (24-26°C) |
| Feeding ratio | 1:1:1 starter, flour and water by weight |
These figures come from King Arthur Baking’s starter guide and Buttered Side Up’s starter tutorial. Methods and numbers can change, so check the sources before you rely on them.
What you need before you start
A starter needs very little equipment, but the right jar makes the week easier. Buttered Side Up recommends a clean jar with a lid, and warns against a metal lid because it can corrode from the acidity of the starter. Cheesecloth or plastic wrap works in a pinch.
Gather these items before you mix anything:
- A clean jar with a lid that is not metal
- A rubber band or marker to show how high the starter rises
- A kitchen scale, ideally one that reads in grams
- A spatula or spoon, preferably stainless steel or plastic
The scale matters more than it seems. King Arthur Baking suggests weighing your ingredients, preferably in grams, for the best accuracy and results.
The rubber band or marker gives you a simple way to see progress. Mark the height of the starter after each feeding, and you can tell at a glance how much it has risen since. If it keeps climbing to the top of the jar, it may be time to move to a bigger one.
As for the stirring tool, Buttered Side Up notes that sourdough is harder to clean off wood. A smooth plastic or steel utensil saves you scrubbing.
Choosing flour and water
Start with whole grain flour. King Arthur Baking explains that the wild yeast that gives a starter its life is more likely to be found in the flora- and fauna-rich environment of a whole grain flour than in all-purpose flour. Whole wheat is the easy, widely available choice, and pumpernickel works too.
Buttered Side Up adds two details worth following. Use fresh flour to avoid rancid oils, and choose unbleached white flour later on, because yeast and bacteria do not like bleach and it can slow the whole process.
Water is simpler than many beginners expect. King Arthur Baking says tap water is fine unless it is so heavily treated that you can smell the chemicals, and it recommends room-temperature water at 68°F to 70°F. If your house is chilly, use lukewarm water; if it is hot, use cool water.
Buttered Side Up is stricter about chlorine. Chlorine is added to drinking water to kill harmful microorganisms, and it can also kill the beneficial yeast and bacteria you are trying to grow. If your water is chlorinated, switch to filtered or distilled water, and keep it below 110°F (43°C) so the heat does not harm the yeast.
A step-by-step feeding routine
The routine below blends the two sources. It is a daily rhythm of mixing, waiting, discarding and feeding, and it needs only a few minutes each day.
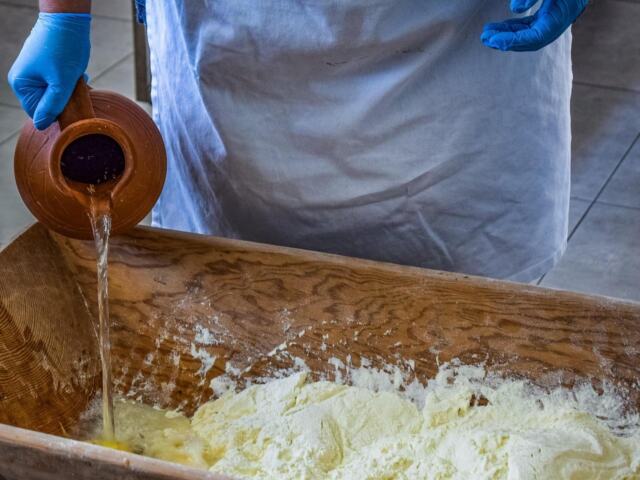
- Weigh 113 g of whole wheat or pumpernickel flour into your jar, following King Arthur Baking’s first-day amount. Add an equal weight of water, since Buttered Side Up feeds equal weights of flour and water rather than equal volumes.
- Stir until no dry flour remains, then cover the jar loosely with a non-metal lid.
- Mark the starter’s level with a rubber band or marker, and set the jar in a warm spot. Buttered Side Up suggests the top of the fridge or next to the stove.
- Each day, discard most of the starter, then feed what is left with equal weights of flour and water.
- After a few days of feeding with whole wheat flour only, switch to a 50/50 blend of whole wheat and unbleached white all-purpose flour.
- Keep watching the marker. A starter that rises above the line after a feeding is getting stronger.
Your kitchen does not need to be perfect. Buttered Side Up says an ideal house sits at 75-80°F (24-26°C), but you can still get a starter going in a chillier home if you choose the warmest spot you have.
The flour switch in step five has a practical purpose. Buttered Side Up explains that a starter fed only whole wheat flour needs feeding at least 2 times a day, because the whole grain makes it so active that it eats up the nutrients quickly. The blend slows fermentation, so you do not have to feed it as often.
Why do you discard part of the starter?
Discarding feels wasteful at first, but it keeps the jar manageable. Buttered Side Up says a starter should be fed at a 1:1:1 ratio of starter, flour and water. With 30 grams of starter, you feed 30 grams each of flour and water, which gives 90 grams of starter.
Skip the discard and the amounts balloon. By the fourth feeding, the same source calculates, you would have to add 2,430 grams of flour and water. That is a lot of flour for something that is still only a jar of bubbling paste.
You can also start small. Buttered Side Up recommends a mini starter, because there is less to discard and less flour to use up.
Discard does not have to go in the bin. Keep it in a separate jar, and when you have accumulated about a cup, you can use it to make pancakes.
Troubleshooting a slow starter
A starter that sits flat for several days is usually reacting to something in the setup, not failing for good. Check the likely causes in this order:
- Bleached flour: yeast and bacteria do not like bleach, and it can slow the process or stop a starter from taking off at all.
- Chlorinated water: chlorine can kill the yeast and bacteria you are trying to cultivate, so use filtered or distilled water.
- Hot water: keep it below 110°F (43°C) so the yeast is not harmed.
- Old flour: stale flour can carry rancid oils, so use fresh flour.
- A cold spot: move the jar somewhere warmer, such as beside the stove.
Whole grain flour is also the easier route. Buttered Side Up says yeast and bacteria like whole grain flour, so a starter is easier to get going than with white flour alone. If you have been using white flour, go back to whole wheat for a few feedings.
Change one thing at a time. That way you can tell which adjustment made the difference.
Keeping your starter going
Once the jar is rising and bubbling, you have a starter you can use again and again. King Arthur Baking describes the week of feeding as minimal daily effort for a starter you can reuse. Keep it on the same regular feeding rhythm and keep marking the level so you can compare day to day.
When you are ready to bake, a simple loaf is the best first test. Try this sourdough bread recipe for beginners once your starter reliably rises after feeding.
If your first loaf turns out heavy, read about why is my sourdough dense before you blame the starter. A tight crumb can come from several causes, and the starter is only one of them.
Frequently asked questions
Do I need bottled water to make a starter?
Show answer
Not usually. King Arthur Baking says tap water is fine unless it is so heavily treated that you can smell the chemicals. If your water is chlorinated, Buttered Side Up suggests filtered or distilled water instead.
Can I use all-purpose flour from the start?
Show answer
You can, but whole grain flour gives you a better chance. King Arthur Baking says wild yeast is more likely to be found in whole grain flour than in all-purpose flour. Buttered Side Up recommends whole wheat first, then a 50/50 blend with unbleached white flour.
How long does it take to make a starter?
Show answer
King Arthur Baking describes about a week of feeding, nurturing and coaxing flour and water into a bubbling, vigorous starter. Your kitchen temperature and flour can change the pace, so judge by the rise and bubbles rather than the calendar.
Do I really need a kitchen scale?
Show answer
It is not mandatory, but it helps. King Arthur Baking suggests a scale, preferably one that measures in grams, and Buttered Side Up also recommends one because it cuts down on dishes. Buttered Side Up gives volume measurements as a backup.
What can I do with the discarded starter?
Show answer
Keep it in a jar in a separate place. Once you have accumulated about a cup, Buttered Side Up suggests using it to make pancakes.